Dog Leash Reactivity Training: Step-by-Step Protocol
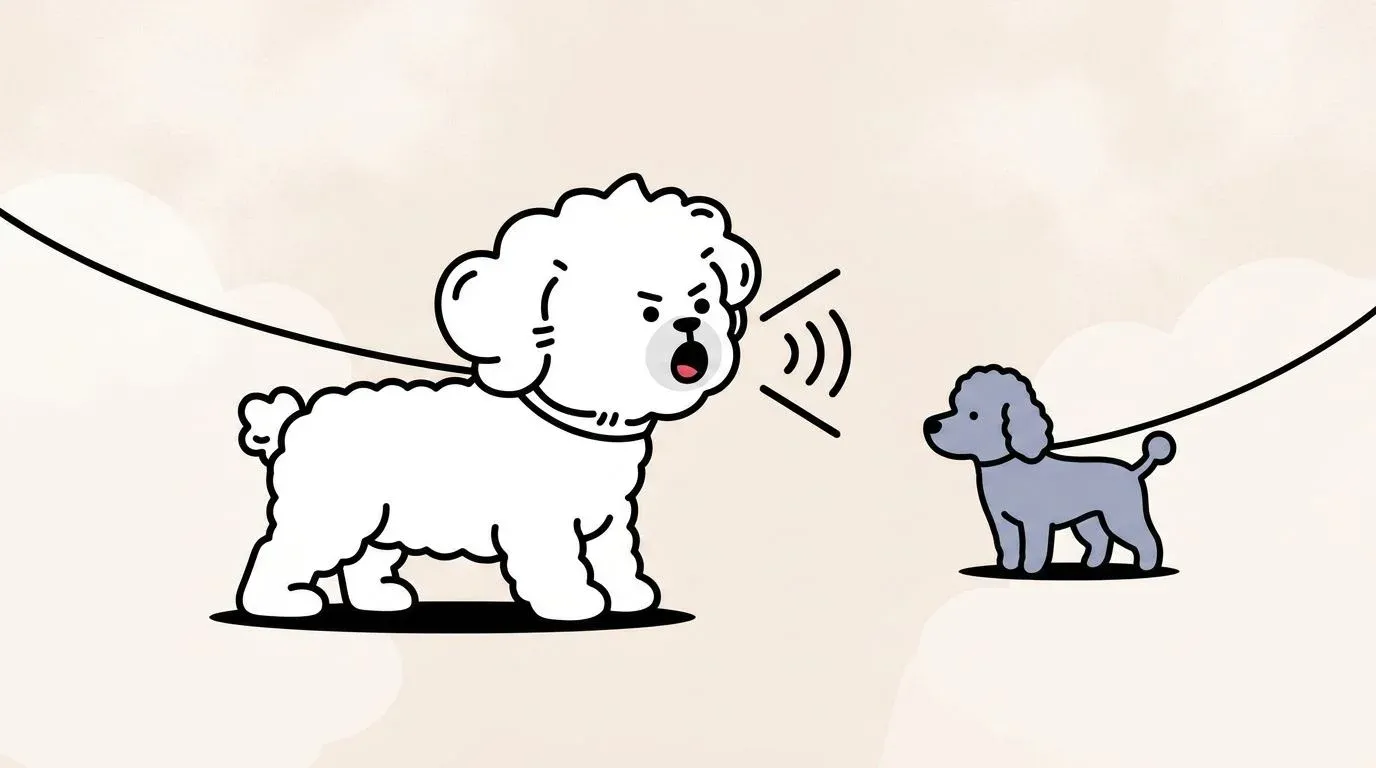
Walking a leash-reactive dog is exhausting in a way that’s hard to explain to anyone who hasn’t done it. You spot another dog a block away and immediately tighten up. Your dog spots it a half-second later. Then comes the barking, the lunging, the leash-burning. You’re left embarrassed and drained — and your dog is no calmer than when you started.
Here’s what matters: leash reactivity is not aggression, it is not a personality flaw, and it is not permanent. It is a learned response that can be systematically unlearned using behavior science that has decades of evidence behind it.
This guide lays out a structured 5-step dog leash reactivity training protocol grounded in desensitization and counter-conditioning — the same approach used by certified professional dog trainers and veterinary behaviorists. Each step builds on the previous one, and progress is measured in concrete, observable milestones rather than vague reassurances.
Why Your Dog Reacts to Other Dogs on Leash
Before beginning any training protocol, you need to understand what is driving the behavior. Leash reactivity is not one thing — it splits into two functionally different types, and the nuances matter for how you train.
Fear-Based Reactivity: The Defensive Barker
Fear-based reactive dogs bark and lunge because they are frightened. The leash prevents escape, so the only available option is to make the threat go away through threat display. From an evolutionary standpoint, this makes perfect sense: if you can’t flee, looking as scary as possible is the next best option.
Body language cues in fear-based reactive dogs include:
- Ears pinned back or flattened
- Tail low, tucked, or stiff at base but not wagging
- Weight shifted back or body crouched before the reaction
- Hard staring followed by explosive barking
- Attempts to retreat if given the chance after reacting
- Panting, yawning, or lip-licking near the trigger (stress signals before full reactivity)
These dogs are not “dominant” or “aggressive by nature.” They are frightened animals doing what frightened animals do. Punishment in this context worsens the underlying fear, which worsens the reactivity. This is consistent with the American Veterinary Society of Animal Behavior’s position that aversive methods are contraindicated for fear-based behavior problems.
Frustration-Based Reactivity: The Overexcited Greeter
Frustration-based reactive dogs often have excellent social skills off leash. On leash, however, they lose their minds at the sight of another dog — pulling, barking, spinning, whining. This is barrier frustration: the dog desperately wants to approach and greet, the leash prevents it, and frustration erupts as reactive behavior.
Body language cues in frustration-based reactive dogs include:
- High, stiff or loosely wagging tail
- Forward weight shift, body straining toward the trigger
- Piloerection (raised hackles) sometimes present but not always
- High-pitched or mixed-tone barking rather than deep alarm barking
- No attempt to retreat — dog is pushing forward, not back
- Rapid recovery after the trigger passes; dog may look happy moments later
| Feature | Fear-Based | Frustration-Based |
|---|---|---|
| Primary emotion | Fear / anxiety | Arousal / frustration |
| Body posture | Weight back, crouched | Weight forward, straining |
| Tail position | Low or tucked | High or mid-range, active |
| Vocalization | Alarm bark, growl | High-pitched, urgent bark |
| Recovery time | Slow, remains stressed | Fast, dog settles quickly |
| Off-leash behavior | Often cautious or avoidant | Friendly, playful |
| Training emphasis | Build confidence, reduce fear | Impulse control, calm greeting |
Many dogs show a mix of both types. Identifying which pattern dominates will help you choose where to place your training emphasis.
How Your Response Reinforces the Cycle
Most owners respond to reactivity by tightening the leash and pulling back, issuing sharp verbal corrections, or crossing the street in a rush while the dog continues to bark. Each of these inadvertently reinforces the pattern.
A tight leash communicates tension to the dog, elevating their arousal. Shouting “no” or “quiet” can be interpreted as the owner also alarmed by the approaching dog, validating the dog’s concern. Even successfully creating distance — which feels like relief — can reinforce the reactive behavior because the dog learns that reacting makes the scary or exciting thing go away.
The training protocol below addresses each of these reinforcement traps directly.
Before You Start: Setup for Success
The difference between training that works and training that stalls often comes down to preparation. Three elements make an outsized difference.
Choosing the Right Gear: Why Front-Clip Harnesses Matter
A front-clip harness (clip ring on the dog’s chest) provides significantly more directional control than a back-clip harness or flat collar. When a dog lunges forward, the front clip naturally redirects their body toward you rather than allowing them to throw their full weight against the leash.
This matters during training for two reasons. First, you can redirect the dog’s attention and position without the physical force required with back-clip gear. Second, it reduces the risk of tracheal injury from leash tension — a genuine concern with reactive dogs who repeatedly throw themselves against the leash.
Avoid choke chains, prong collars, and electronic collars for leash reactivity training. Beyond the ethical concerns, these tools escalate arousal and introduce pain into the walking context, which can create new negative associations and worsen fear-based reactivity. The Animal Humane Society and major behavior organizations are explicit on this point.
High-Value Treats and Reward Timing
Not all treats are created equal. During desensitization training near triggers, you need food rewards your dog will take and eat even when moderately aroused. Test your candidates: if your dog will take the treat readily in your home, it will probably work at sub-threshold distances. If your dog ignores even the best treat in the presence of another dog, you are already over threshold.
Practical candidates include small pieces of cooked chicken, freeze-dried meat, or cheese. Keep pieces small (pea-sized) — you’ll be delivering many of them during a single session.
Timing is critical. Reward within one to two seconds of the desired behavior. Late rewards reinforce whatever the dog was doing at the moment of delivery, not the behavior you intended to mark.
Picking Your Training Environment
Early sessions should happen in predictable, lower-traffic environments where you can control exposure. Dead-end streets, quiet parks in off-peak hours, or large parking lots all work well. You need the ability to see approaching dogs early enough to set up at the correct distance.
Avoid starting training during peak dog-walking hours (early morning and late afternoon on weekdays) until your dog has made meaningful progress. Success in training depends on staying under threshold — the reactive ceiling your dog has for a given trigger. A training session where your dog reacts repeatedly is not practice; it is rehearsal of the unwanted behavior.
Step 1: Find Your Dog’s Threshold Distance
The threshold distance concept is the cornerstone of effective leash reactivity training. Everything else in this protocol depends on understanding it.
What Threshold Distance Means
Your dog’s threshold is the boundary between two behavioral states. Below threshold, your dog is alert and aware of a trigger but still capable of taking food, responding to cues, and making rational decisions. Above threshold, the dog’s emotional system has taken over — they are in a reactive state and classical training approaches stop working because the dog cannot process information normally.
Threshold distance is individual. One dog might begin reacting when another dog enters within 30 feet; another might not react until 8 feet. The same dog may have different thresholds depending on context: size of the approaching dog, whether the approaching dog is reactive itself, time of day, and the dog’s baseline stress level on that particular walk.
How to Identify Your Dog’s Specific Threshold
To find your dog’s threshold, you need controlled exposure. Walk in an area where you can spot approaching dogs at a distance, then observe your dog’s response as the distance decreases.
Watch for early warning signs before full reactivity kicks in:
- Body suddenly becomes very still and rigid (freeze response)
- Hard, unblinking stare at the trigger
- Ears forward and locked onto the target
- Subtle lip curl or forward weight shift
- Loss of interest in treats that the dog was taking moments before
The moment you see any of these signals, you are approaching threshold. The working distance for training is at least 10 to 15 feet beyond where these first signs appear. This buffer is your training zone — where the dog is aware of the trigger but still under enough self-control to participate in the learning process.
Document this distance in different contexts over the first week. You will likely find your dog’s threshold varies, and understanding the range helps you plan sessions appropriately.
Step 2: Practice the Look-and-Turn Exercise
The look-and-turn exercise (also called the “engage-disengage” game) trains your dog to notice a trigger and automatically orient toward you rather than toward the trigger. It works through classical counter-conditioning: the sight of another dog becomes a reliable predictor of something good happening with you.
The Trigger-Notice-Redirect-Reward Cycle
The sequence is simple in description, but precise in execution:
- Your dog notices the trigger dog (you will see the body language shift: head turning, ears orienting)
- The moment your dog notices — before any escalation — say your marker word (“yes”) or click
- Redirect your dog’s attention to you with movement or a hand target
- Deliver the high-value treat immediately when your dog orients toward you
You are not asking your dog to ignore the other dog. You are rewarding the moment of noticing before any reactive behavior begins. Over many repetitions, the dog learns: “Another dog appears → I look at my owner → good things happen.”
Initially, your cue to redirect can be your name or a hand target. After sufficient repetitions at sub-threshold distances, many dogs begin auto-orienting toward their owner when they spot another dog — without any cue from you. This is the behavior you are building toward.
Indoor Pre-Training Drills
Before taking this to the street, build the underlying mechanics at home. Practice the “watch me” cue (sustained eye contact) until your dog can hold it for 10 seconds in a distraction-free room. Then practice in progressively more distracting environments: the backyard, a street with foot traffic but no dogs, and finally low-traffic areas with occasional dogs at a significant distance.
This indoor foundation matters because dogs do not automatically generalize behavior across environments. Skills built in one context must be reinforced in new contexts before they become reliable. Think of it as teaching your dog the vocabulary before taking the exam in a high-stakes environment.
A practical drill: sit facing your dog at home. Hold a treat near your face to encourage eye contact. Say “watch me,” mark the moment your dog makes eye contact, and reward. Practice 5-minute sessions twice daily. Aim for 30 successful repetitions before moving to a more distracting environment.
Step 3: Desensitization and Counter-Conditioning
With threshold distance identified and the look-and-turn exercise solid in low-distraction environments, you can begin the formal desensitization process. This is the core of dog leash reactivity training, and it is where most owners either see dramatic progress or common mistakes.
Gradually Closing the Distance
Desensitization means systematically reducing your dog’s emotional response to a stimulus by exposing them to it at low enough intensity that no fear or frustration response is triggered. The exposure must be below threshold — this point cannot be overstated. Reactive rehearsals undo training progress.
Work at your identified sub-threshold distance for multiple sessions until your dog shows consistently neutral or positive responses to passing dogs at that distance. Criteria for moving closer: your dog notices the trigger, orients toward you, takes treats readily, and shows relaxed body language through the entire exposure.
Reduce distance in small increments — 2 to 3 feet at a time. Do not rush this. A common error is moving through the protocol too quickly because the dog seems to be doing well. If you close distance and your dog begins showing early warning signs again, step back to the previous successful distance and consolidate there before advancing.
A practical progression structure for most dogs:
| Week | Target Working Distance | Expected Behavior | Success Criteria |
|---|---|---|---|
| 1–2 | 30–40 feet from trigger | Alert but takes treats, will look at owner on cue | 5 of 5 exposures without reactive behavior |
| 2–3 | 20–25 feet | Orients toward owner after noticing trigger | Auto-orient beginning, loose leash maintained |
| 3–4 | 15–20 feet | Relaxed body language at trigger distance | Can perform “sit” and “watch me” cues near trigger |
| 4–6 | 10–15 feet | Minimal arousal response, passing dogs with loose leash | Passes 3 different dogs at this distance without reacting |
| 6–8+ | Under 10 feet | Brief glance at trigger, then orient to owner | Can walk past approaching dog on a loose leash |
Progress is rarely linear. Expect good days, regression days, and weather/context effects on your dog’s threshold. Regression is normal and does not mean the training has failed — it means your dog had a harder day and you need to work at a greater distance temporarily.
Building the ‘Other Dog = Good Things’ Association
Counter-conditioning runs in parallel with desensitization. Every time your dog is sub-threshold and another dog appears, deliver high-value treats — whether your dog reacts or not (provided they are still below threshold). The treats stop when the other dog is out of sight.
This creates a clear associative structure: other dog appears → treats arrive. Other dog leaves → treats stop. The technical term is a classical conditioning protocol because you are pairing the neutral or negative stimulus (other dog) with an unconditional positive stimulus (high-value food). Over time, the presence of another dog begins to elicit a positive anticipatory emotional response rather than fear or frustration.
This is a fundamentally different mechanism from operant training (reward for performing behaviors). Both are operating simultaneously during this protocol, but the counter-conditioning component is working at the emotional level — changing how your dog feels, not just what they do.
Dog socialization training principles overlap here: building positive associations through controlled, sub-threshold exposure is the same mechanism that drives effective puppy socialization. Reactive dogs are, in a sense, undergoing remedial socialization — relearning that the world is manageable and even good.
Step 4: Real-World Walk Application
Laboratory conditions make training easier. Real walks are messier: dogs appear suddenly from around corners, owners approach without warning, dogs are off-leash in areas marked “on-leash only.” This step is about building practical skills for the actual walk environment.
Emergency Protocols: The U-Turn and Escape Routes
No matter how well your training is progressing, you will encounter situations where your dog is caught off guard and pushed over threshold. Having emergency protocols prepared in advance prevents these moments from becoming training set-backs.
The U-Turn is your primary tool. The moment you recognize an unexpected trigger approaching too close, give a calm, upbeat “let’s go!” and smoothly pivot 180 degrees, walking in the opposite direction. Practice this at home first — without the pressure of a real trigger — so the mechanics are smooth. A panicked pivot while you’re already tense will not help your dog.
The key to an effective U-turn is starting before your dog has spotted the trigger or before they’ve escalated. If your dog has already locked on and entered threshold, a U-turn becomes harder to execute cleanly. This is why environmental scanning — watching well ahead of you during walks — is a skill worth developing in yourself, not just your dog.
Escape routes are literal: identify nearby alleys, driveways, or parked vehicles you can duck behind to put visual distance between your dog and a trigger quickly. Knowing your route in advance makes these decisions faster in the moment.
Strategic Route and Timing Planning
During active training, treat your walk routes as a deliberate choice rather than a default habit. Walk during low-traffic times: mid-morning and mid-afternoon weekdays tend to be quieter than early morning and late afternoon. Avoid off-leash dog parks or areas where unexpected encounters are likely.
Use physical geography to your advantage. A parked car between your dog and a trigger dog provides a visual barrier that can meaningfully reduce your dog’s arousal — the other dog exists but is not in direct line of sight. Wide streets allow you to work the far side. Dead-end streets with low traffic give you predictable, controllable environments.
As your dog makes progress, you can deliberately choose training environments with appropriate exposure levels: one or two dogs in the distance, manageable and predictable. Controlled exposure is training; uncontrolled flooding is just stress.
If general leash skills are also a work in progress, building loose leash walking basics before or alongside reactivity training reduces the physical challenge of managing your dog during encounters and frees your attention for the reactivity protocol.
Step 5: Generalization and Maintenance
A dog who behaves well near triggers in one familiar park has not fully learned leash reactivity training. Generalization — the extension of learned behavior across different environments, different triggers, and different contexts — is the final step of the protocol.
Practicing Across Different Environments
Dogs are context-specific learners. A calm response at your local park may not transfer automatically to an unfamiliar neighborhood with different smells, sounds, and trigger presentations. Plan to practice in at least five to six different environments before considering a skill reliably generalized.
When introducing a new environment, start at greater threshold distances than you have been using. New environments elevate baseline arousal, which effectively tightens threshold. Once your dog demonstrates the same calm responses at sub-threshold distances in the new environment, you can close the distance at the same gradual pace as before.
Vary the type of triggers as well. Reactive dogs often have specific trigger profiles — small dogs may be more provocative than large dogs, or intact males more arousing than neutered dogs. Identify your dog’s specific hierarchy and make sure training covers the full range.
Progress Markers: How to Measure Success
Progress in leash reactivity training is not binary. Measuring it in specific, behavioral terms prevents the frustration of feeling like “nothing is working” when meaningful changes are occurring below the threshold of obvious reaction.
Concrete markers to track:
- Threshold distance: Has it decreased measurably over four weeks?
- Recovery time: After a reactive episode, how quickly does your dog return to a calm state? Reducing recovery time from 10 minutes to 2 minutes is significant progress.
- Auto-orient rate: Is your dog increasingly looking to you when they notice another dog, without being cued?
- Trigger hierarchy changes: Is your dog calm near trigger types that previously caused full reactions?
- Loose leash retention: Can your dog see another dog at threshold distance while maintaining a loose leash?
Keep a simple log: date, location, trigger distance, dog’s response, treats accepted or refused. Over weeks, patterns emerge that are not visible session to session.
3 Common Mistakes That Make Reactivity Worse
The three most common training errors with leash-reactive dogs are not mistakes born of carelessness — they are intuitive responses that happen to be counterproductive.
Leash Corrections and Verbal Punishment
Jerking the leash, issuing sharp verbal corrections (“no,” “stop,” “bad”), or physically restraining the dog during a reactive episode feels like intervention. Behaviorally, it is something different: adding an aversive stimulus in the presence of the trigger.
For a fear-based reactive dog, this communicates: “Something scary appeared AND something painful/startling happened.” This can consolidate fear associations rather than weaken them, potentially making reactivity worse over time. The same logic applies to verbal punishment — your dog does not interpret “no” as “your behavior is incorrect.” They experience it as an additional negative event in an already-stressful context.
If general bark control techniques are relevant to other contexts in your dog’s life, understanding bark control methods that use positive reinforcement can be integrated — but leash reactivity specifically requires the desensitization approach described here, not suppression of the bark as an isolated behavior.
Forced Socialization Attempts
“He just needs to meet more dogs and he’ll get over it.” This is one of the most persistent misconceptions about leash reactivity. Forcing a reactive dog into close proximity with another dog before they are ready does not extinguish the reactive response — it confirms that their threat assessment was correct and that close proximity to other dogs is genuinely dangerous or overwhelming.
Flooding — the technical term for forced exposure to the full intensity of a feared stimulus — occasionally works in very specific clinical contexts under professional supervision. Applied by well-intentioned owners in an uncontrolled setting, it far more commonly sensitizes rather than desensitizes.
Your dog earns proximity to other dogs through demonstrated readiness at each distance step, not through exposure they haven’t been prepared for.
Using Aversive Training Tools
Shock collars, prong collars, and choke chains all function by delivering pain or discomfort to redirect or suppress behavior. For leash reactivity, this approach has a specific failure mode: the dog may suppress the visible reactive behavior (because the correction is more immediately aversive than the trigger) while the underlying fear or frustration response remains — or intensifies.
This can produce a dog who appears “cured” but whose internal stress has increased, which can manifest later as escalated aggression in contexts where the correction tool is absent. Veterinary behaviorists consistently report this pattern in dogs referred for aggression with a history of aversive training tools used for reactivity.
When to Seek Professional Help
Self-directed dog leash reactivity training works for many dogs, particularly when behavior is caught early and the owner can implement the protocol consistently. Certain presentations, however, warrant direct professional involvement.
Consider consulting a certified professional dog trainer (CPDT-KA) or a board-certified veterinary behaviorist if:
- Your dog has a bite history, even a single incident. Bite history significantly changes risk assessment and protocol requirements.
- Reactivity is escalating in intensity despite consistent training, not improving.
- Reactive behavior occurs in contexts beyond the leash: in the yard, through windows, in the car.
- Your dog’s reactivity is accompanied by other anxiety-based behaviors. Fear-based reactivity often coexists with noise phobia, separation anxiety, or generalized anxiety — conditions that can be exacerbated by one another. Dogs with noise phobia in particular often have elevated baseline anxiety that tightens reactivity thresholds across all contexts.
- You suspect pain as an underlying factor. Pain changes behavior in ways that are easy to misread as “behavioral” problems. A dog with undiagnosed joint pain or other discomfort may display increased irritability and lower thresholds on walks. Recognizing behavioral signs of pain in dogs before attributing all changes to behavioral causes is an important step.
- Your dog shows signs of redirected aggression toward you during reactive episodes.
Medication can also be part of an appropriate treatment plan for severe anxiety-based reactivity. Veterinary behaviorists can prescribe anti-anxiety medications that reduce baseline arousal and make behavioral protocols more effective. Medication is not a substitute for training — it creates a neurological window in which training is more likely to succeed.
The goal of professional intervention is not to transfer responsibility, but to ensure that the protocol is matched to your dog’s specific presentation and that risk is managed appropriately while progress is built.
FAQ
How long does leash reactivity training take?
Can small dogs be leash reactive too, and is training different?
Can senior dogs learn leash reactivity training?
My dog is fine off leash but reactive on leash — why?
Related Articles
Dog Lethargy Causes: When Slowing Down Signals More Than Just Aging
Learn how to distinguish normal dog tiredness from true lethargy, identify dog lethargy causes by age, and know which signs need emergency vet care.
Veterinary Guide to Cat Overgrooming: Causes, Treatment, and When to Worry
Cat overgrooming causes range from allergies to anxiety. This vet-backed guide covers diagnosis, body-area mapping, treatment options, and when to see a doctor.
Does Your Senior Dog Have Dementia? A Veterinary Guide to Canine Cognitive Dysfunction
Learn the 7 DISHAAL domains to assess dog dementia symptoms at home, understand evidence-based treatment options, and know when to call your vet.
Dog Noise Phobia Treatment: Thunder and Fireworks Guide
Step-by-step guide to treating dog noise phobia from thunder and fireworks. Desensitization protocol, tool comparisons, and when to see a vet.
Is Your Dog in Pain? 7 Subtle Signs Most Owners Miss
Learn the 7 behavioral signs your dog is in pain that are easy to overlook, how to tell acute from chronic pain, and what to do before your vet visit.
Dog Separation Anxiety Guide: Symptoms, Training, and Help
Learn how to identify dog separation anxiety symptoms, follow a vet-backed step-by-step training plan, and know when medication or a specialist is needed.
Dog Walk Refusal: Is It Behavior or Hidden Joint Pain?
Dog walk refusal may signal arthritis, hip dysplasia, or IVDD. Use our 10-point checklist to tell behavioral causes from joint pain—and what to do next.
If Your Dog Won't Stop Barking: Type-by-Type Training Guide
Stop dog barking by identifying the type. 5 types, targeted training protocols, and realistic timelines — evidence-based guide for dog owners.
Transform Your Indoor Cat's Behavior and Health by Redesigning Their Play Environment
Use the AAFP/ISFM Five Pillars framework to build a science-backed indoor cat enrichment plan—from hunting sequence play design to sensory stimulation and behavior monitoring.
How to Start Nose Work with Your Dog: A Step-by-Step Beginner's Guide
Learn how to start nose work with your dog using a 5-stage progressive protocol. From palm treat finds to outdoor scent detection — start today with no special equipment.
How to Introduce Cats: A Step-by-Step Guide From Isolation to Harmony
Learn how to introduce cats using a proven 5-step protocol with clear timeline ranges, age and sex strategies, and a failed-introduction recovery plan.
Dog Coprophagia: Why Dogs Eat Poop and How to Stop It
Dog coprophagia affects 1 in 6 dogs. Learn the three types, their distinct causes, evidence-based correction protocols, and why most deterrents don't work.
How to Crate Train Your Dog: A Step-by-Step Guide from First Introduction to Calm Alone Time
Learn how to crate train a dog with a 5-step protocol, age-based time limits, and troubleshooting for crying, crate aversion, and accidents.
Loose Leash Walking Training: 5 Steps to Stop Dog Pulling
Stop your dog pulling on walks with this 5-stage loose leash walking training guide — from indoor introduction to real-world heel, with troubleshooting.
Is Your Dog Guarding More Than Just the Food Bowl? Types of Resource Guarding and How to Fix Them
Dog resource guarding goes beyond food bowls. Learn the 4 types, a severity assessment framework, and type-specific training protocols to stop guarding safely.
Bringing Home a New Puppy? The Complete Socialization Training Guide You Need
Learn the science behind puppy socialization windows, get a week-by-week timeline, and discover safe pre-vaccination methods with a practical category-based checklist.
Cat Meowing at Night: 3 Common Responses That Make It Worse
Cat meowing at night is disrupting your sleep—and your usual fixes may be making it worse. Learn the behavioral science behind night crying and a 4-step evening routine that actually works.
How to Potty Train a Puppy: The Complete Guide for First-Time Dog Owners
Learn how to potty train a puppy with crate training, bell training, nighttime protocols, regression fixes, and tips for apartment living and rescue dogs.
How to Stop Puppy Biting: Age-by-Age Training Guide
Learn how to stop puppy biting with science-backed methods, age-specific protocols from 8 weeks to adulthood, and a step-by-step training system.
Does Your Cat Have Separation Anxiety? Signs to Watch and How to Help
Learn the real signs of cat separation anxiety symptoms, how to tell anxiety apart from boredom, and a week-by-week desensitization protocol you can start today.
Dog Excessive Licking Causes: Normal vs. Concerning Signs
Dog excessive licking causes include skin allergies, joint pain, anxiety, and GI distress. Learn the body-region diagnostic map and when to call a vet.
If Your Cat Keeps Biting: Types of Aggression and How to Respond
Discover why your cat bites, how to identify all 6 types of cat aggression, and evidence-based strategies to stop cat biting — including petting threshold signals.
Can't Stop Your Cat From Scratching Furniture? Behavioral Science Says Otherwise
Discover why cats scratch furniture, why punishment makes it worse, and a 5-step science-backed protocol to redirect cat scratching behavior permanently.
If Your Dog Keeps Eating Grass on Walks, Here's What It Really Means
Why do dogs eat grass? Learn the 5 real causes — from instinct to pica — plus when it's dangerous, what to do, and safe alternatives to offer instead.