7 Essential Dog Paw Care Tips Every Owner Should Know
Every step your dog takes lands on bare pads against asphalt, gravel, salted sidewalks, and frozen ground. Those pads absorb summer heat, shed winter cold, and cushion every impact — all without complaint. Dog paw care is often overlooked simply because paws are out of sight, but the consequences of neglect range from painful cracks and burns to infections that require veterinary treatment.
This guide covers the seven areas that matter most: paw anatomy, moisturizing, nail trimming, summer burn prevention, winter frostbite and de-icer hazards, injury first aid, and excessive paw licking. Each section is built around what you can check and do at home, with clear guidance on when to bring in a veterinarian.
Understanding Your Dog’s Paw Anatomy
Effective paw care starts with knowing what you’re looking at. A dog’s paw is not simply a thick patch of skin — it’s a layered, load-bearing structure with multiple functions.
The Structure of Paw Pads
Each paw contains several distinct pads: four digital (toe) pads, one central metacarpal or metatarsal pad, and — on the front legs — a carpal pad slightly higher on the wrist. The outer surface of each pad is formed by a dense keratinized layer (stratum corneum), giving it the tough, slightly rough texture you feel. Beneath that lies the dermis and a layer of specialized adipose tissue that acts as a shock absorber.
According to research published in veterinary anatomy literature, canine digital pads also contain sudoriferous (sweat) glands — the only significant source of eccrine sweating in dogs — which contribute modestly to thermoregulation and provide trace amounts of moisture to prevent the pad surface from drying out completely. The pads connect directly to the bones of the digits, which means structural problems in the pad have a direct mechanical relationship with joint alignment and gait.
What Paw Pads Do: Shock Absorption, Temperature Regulation, Sensory Input
Shock absorption: The fat layer beneath the pad surface compresses with each stride, dissipating the impact forces that would otherwise travel directly into the bones and joints. This is particularly important during running and jumping. A dog with chronically dry, cracked, or thinned pads loses a meaningful portion of this cushioning.
Temperature regulation: Paw pads contain a countercurrent heat exchange system in their blood vessels (arteriovenous anastomoses) that helps maintain paw temperature even in cold environments. This is why healthy dogs can walk briefly on snow without immediate frostbite — but the system has limits. Prolonged cold exposure, especially when pads are wet, overwhelms it.
Sensory input: The pads are rich in mechanoreceptors that detect pressure, texture, and vibration. This sensory feedback plays a role in balance, coordination, and environmental awareness. A dog pausing to investigate an unfamiliar surface — stepping slowly and carefully — is processing exactly this kind of sensory information.
Paw Pad Moisturizing and Dryness Prevention
Dry, cracked paw pads are one of the most common issues owners discover during routine paw checks. Mild dryness shows as a slightly rough or flaky surface. Left unaddressed, the cracks can deepen to the point of bleeding and become entry points for infection.
Causes of Dry, Cracked Paw Pads
Several factors commonly drive paw pad dryness:
- Indoor heating and low humidity: Central heating in winter and air conditioning in summer both reduce indoor humidity. When ambient humidity drops below 30–35%, pad moisture evaporates faster than it can be replenished.
- Repeated contact with hard surfaces: Long daily walks on concrete, asphalt, and gravel abrade the pad surface over time.
- Incomplete drying after washing: Washing paws and leaving them damp — particularly between the toes — weakens the skin barrier and paradoxically increases moisture loss once the surface water evaporates.
- Age: Senior dogs produce less sebum, making their pads more prone to drying.
- Underlying health conditions: Hypothyroidism and zinc-responsive dermatosis are two conditions where dry, hyperkeratotic pads can be a presenting symptom. If pads are cracking despite consistent moisturizing, a systemic cause is worth investigating.
Safe Moisturizing Methods and Precautions
The right time to moisturize is after a walk: wash the paws if needed, dry them completely — including between each toe — and then apply the moisturizer. Applying balm to damp pads traps moisture unevenly and increases the risk of maceration between the toes.
Application principles:
- Work the product into the pad surface and the skin folds between the toes
- Use a thin, even layer — more is not better
- After the product absorbs, wipe away any excess from between the toes to avoid creating a warm, oily environment where bacteria multiply
- If applying during the day before a walk, allow 20–30 minutes indoors for absorption first
Choosing a paw moisturizer: Look for products formulated specifically for dogs, free of fluoride, parabens, artificial fragrances, and essential oils that are toxic to pets (e.g., tea tree, eucalyptus). Products like Musher’s Secret — a wax-based paw balm — are widely used in North America and have the added benefit of providing a mild protective barrier against salt and pavement heat. Human lotions, including thick moisturizers with urea or salicylic acid, are generally not appropriate for dogs.
A note on over-moisturizing: Pads are designed to have a degree of toughness. Applying heavy amounts of balm daily can soften them excessively, making them more vulnerable to abrasion and cuts. Use moisturizer when pads are visibly dry, not as a daily ritual on pads that are already healthy.
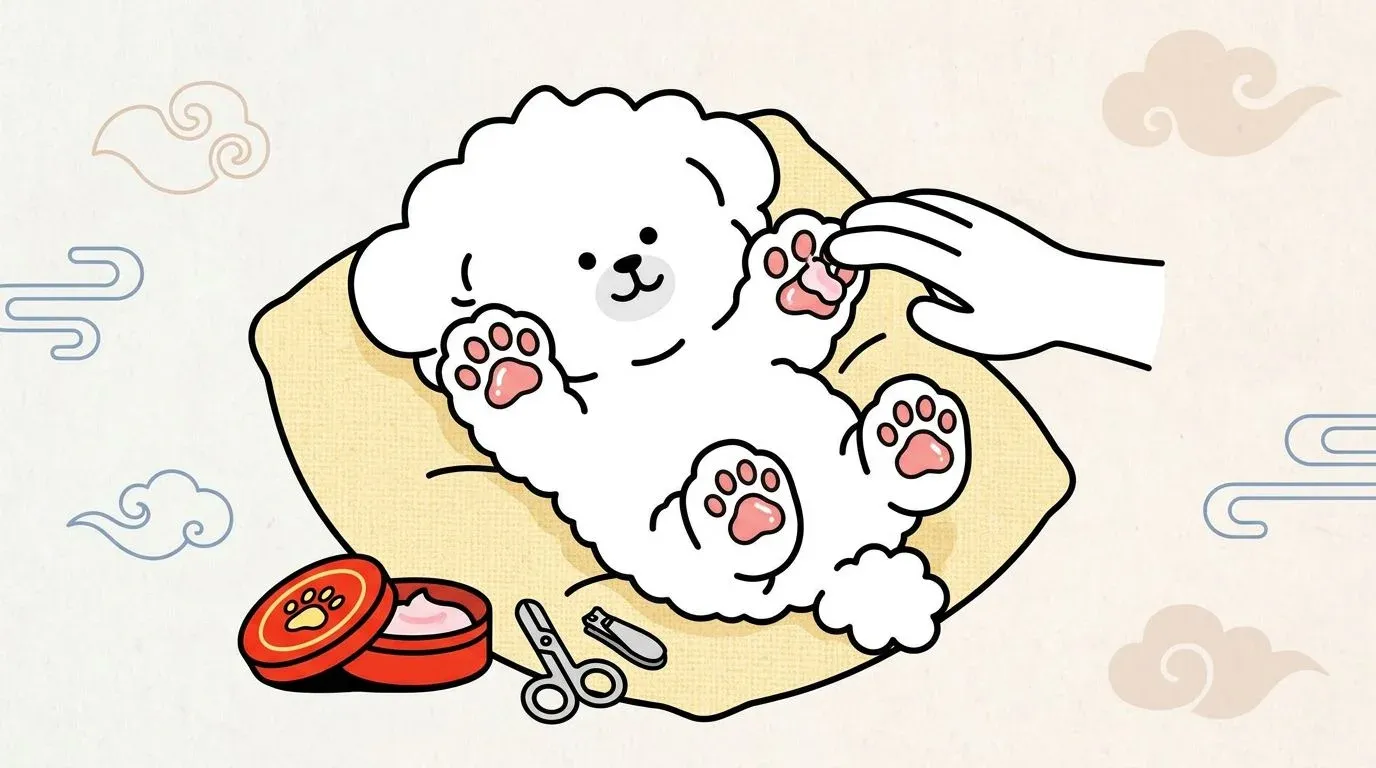
Nail Trimming Basics
Nail length affects far more than appearance. When nails are too long, they make contact with the ground with each step — forcing the toes to splay slightly or the foot to rotate to accommodate the pressure. Over months, this alters gait mechanics and places abnormal load on the digital joints and paw pads. Properly trimmed nails are a foundational element of paw pad care.
How to Tell When Nails Are Too Long
The simplest test is sound. If your dog’s nails click audibly on hard flooring as they walk, the nails are in contact with the ground — which means they’re already too long.
Visually: with your dog standing naturally on a flat surface, the nails should not touch the ground. When viewed from the side, the nail tip should curve slightly upward and clear the floor by a few millimeters. If the nail is parallel to the floor or curves downward past the pad level, it needs trimming.
The quick in dark nails: The quick — the blood vessel and nerve running through the center of the nail — is visible as a pink shadow in white or light-colored nails. In black nails it’s hidden. The safest approach is to trim a small amount at a time and check the cross-section of the cut surface: white or chalky gray means you’re safely away from the quick; a dark or slightly pink circle in the center means you’re approaching it and should stop.
A Step-by-Step Nail Trimming Guide
What you’ll need: Dog nail clippers (guillotine-style or scissor-style, sized for your dog), styptic powder or cornstarch, and high-value treats.
Steps:
- Settle your dog in a comfortable, stable position — sitting or lying on its side. Offer a treat to create a positive association before you begin.
- Hold one paw firmly but gently. Press lightly on the toe pad to extend the nail.
- Identify the quick (in clear nails) or proceed cautiously (in dark nails).
- Cut 1–2 mm at a time, taking multiple small cuts rather than one large one.
- Stop when the cut surface shows any pink tinge — that’s your margin.
- File any sharp edges with a nail file or emery board to prevent snagging on carpets or scratching skin.
Frequency: Most dogs need nail trims every 3–4 weeks. Dogs with high activity levels on hard surfaces (pavement, concrete) may naturally wear their nails down faster and can go slightly longer between trims.
For dogs that resist: Start by handling paws daily without clippers — just touching, massaging toes, pressing gently on pads. Then introduce the clippers at a distance, let the dog sniff them, and practice the motion near the nail without cutting. Pair every step with treats. Desensitization over 1–2 weeks makes the actual trimming far less stressful for both dog and owner.
Summer Paw Burn Prevention
Pavement burns are more common than most owners realize — and they happen at ambient temperatures that feel comfortable to humans. The ground absorbs and retains radiant heat far more efficiently than air, meaning your dog’s pads are often walking on a surface that is dramatically hotter than the temperature your weather app reports.
How to Check Pavement Temperature (7-Second Rule)
On a warm day, press the back of your hand flat against the pavement for 7 seconds. If you cannot hold it there comfortably for the full 7 seconds, the surface is too hot for your dog’s paws.
The numbers behind this: asphalt surface temperature runs 15–25°C (27–45°F) hotter than air temperature. At an air temperature of 32°C (90°F), asphalt can reach 55–60°C (131–140°F). Research on thermal injury thresholds shows that canine paw tissue can suffer burns within 60 seconds at 52°C (125°F). On a typical bright summer afternoon, the window between “feels warm” and “causing burns” is shorter than most owners expect.
Safe summer walking guidelines:
- Walk before 8 AM or after 7 PM when pavement has had time to cool
- Choose shaded routes, grass, dirt paths, or running tracks (rubber surfaces heat less than asphalt)
- If a midday walk is unavoidable, dog booties provide effective protection — allow 1–2 weeks for your dog to adapt to wearing them
For broader summer safety during walks, including hydration and exercise limits in heat, see the dog summer heat stroke prevention guide.
Burn First Aid for Dog Paws
If you suspect a pavement burn — your dog is limping, lifting a paw, or licking the pads repeatedly after a hot-surface walk:
- Move to shade or cool surface immediately. Stop all further ground contact with the hot surface.
- Rinse with cool (not ice cold) water for 15–20 minutes. Ice or very cold water causes vasoconstriction and can worsen tissue damage. Room-temperature or slightly cool tap water is appropriate.
- Assess the pad surface. Look for redness, blistering, peeling, or raw tissue.
- Go to the vet. Any visible surface damage, persistent limping, or a dog that refuses to bear weight on the affected paw warrants same-day veterinary evaluation. Burn injuries can involve deeper tissue damage that isn’t visible on the pad surface.
Do not apply butter, oil, or human burn creams to a paw burn before veterinary assessment — these can trap heat and complicate wound management.
Winter Frostbite and De-Icer Hazards
Cold weather presents two distinct threats to paw health: frostbite from prolonged cold exposure and chemical injury from road de-icers. Both are preventable with a consistent post-walk routine.
Early Signs of Frostbite
The arteriovenous heat exchange system in canine paw pads provides real cold tolerance, but it has limits. Risk increases significantly below -10°C (14°F), in wet conditions, with wind chill, and with small dogs who have less body mass to maintain core temperature.
Early frostbite signs:
- Pale, grayish, or waxy-looking pad surface (the tissue has cooled below its normal circulation threshold)
- Pad that feels hard or stiff to the touch
- Dog lifting a paw or reluctant to put weight on it
As the tissue rewarms, redness, swelling, and pain develop — sometimes 24–48 hours after the cold exposure. In severe cases, blistering and tissue necrosis follow.
| Severity | Signs | Response |
|---|---|---|
| Mild | Pale/gray color, coldness, reduced sensation | Gentle rewarming in 37–40°C (99–104°F) water |
| Moderate | Swelling, blistering, pain on touch | Veterinary visit required |
| Severe | Blackened or necrotic tissue, loss of sensation | Emergency veterinary care |
What not to do: Never rub or massage frostbitten tissue — the ice crystals in frozen cells cause additional damage when disrupted by friction. Do not apply direct heat (heating pads, hot water bottles) directly to the pad. Warm water submersion at the temperatures noted above is the appropriate first aid.
Post-Walk Paw Washing Routine
Road salt and chemical de-icers — products containing calcium chloride, magnesium chloride, or sodium chloride — are ubiquitous on US and UK pavements from November through March. These substances cause three problems: they dry out and crack pad surfaces on contact, they can cause chemical burns with prolonged exposure, and they are toxic if ingested (your dog will lick their paws after returning home).
Winter paw care routine after every outdoor walk:
- At the door, rinse all four paws with lukewarm water — run water between each toe
- Use a soft towel to dry thoroughly, paying close attention to the web spaces between toes
- If using a hair dryer, set it to low heat and keep it at least 20 cm (8 inches) from the paw
- Once paws are completely dry, apply a thin layer of paw balm if pads appear dry
If you’re in a hurry, a bowl of lukewarm water to dip each paw into — followed by a thorough towel dry — removes the majority of de-icer residue. A damp cloth wipe is a minimum; it’s better than nothing but less effective than rinsing.
Dog booties eliminate the de-icer contact problem entirely and are increasingly practical in North American and UK winters. Fleece-lined versions also protect against cold ground contact.
Dealing with Paw Injuries and Foreign Objects
Cuts, punctures, and embedded debris happen — glass fragments on urban sidewalks, thorns in parks, sharp gravel on trails. After every walk in terrain with debris risk, a quick paw inspection is worthwhile. For detailed guidance on checking for ticks and thorns after walks in wooded or grassy areas, see the dog walk tick prevention guide.
Home First Aid for Minor Cuts
Small surface abrasions and shallow cuts can be managed at home initially:
- Remove visible debris carefully. Use clean tweezers for surface-level objects. If the object is deeply embedded, do not attempt removal — go to the vet.
- Rinse with saline or clean running water. Avoid hydrogen peroxide and alcohol — both damage healthy tissue along with bacteria and slow healing.
- Assess depth and bleeding. A surface-level scrape that stops bleeding within a few minutes and doesn’t penetrate the pad deeply can be monitored at home.
- Protect the wound. Indoors, allow air exposure. For any necessary outdoor time, use a dog bootie or a loosely applied bandage. Change coverings daily.
- Prevent licking. Licking introduces oral bacteria to the wound and is the primary driver of secondary infection. An Elizabethan collar (e-collar/cone) is often the most practical solution.
Check the wound daily for signs of healing. The pad surface should gradually close and show no discharge after the first 24–48 hours.
When to See the Vet
Home first aid has clear limits. Seek veterinary care when:
- Bleeding does not stop with 5–10 minutes of firm direct pressure
- The wound is larger than 1 cm or appears to penetrate deeply into the pad
- Bone or tendon is visible in the wound bed
- A foreign object is deeply embedded and cannot be safely removed
- The surrounding tissue becomes swollen, warm, red, or begins discharging within 1–3 days of injury (infection signs)
- Your dog refuses to bear any weight on the affected paw
- The wound shows no improvement after 3–5 days despite home care
Paw pads are in constant contact with the ground — a contaminated, warm, moist environment. Infection risk is higher than with wounds on other body parts, and infections can progress faster than owners expect.
Excessive Paw Licking: Causes and Solutions
Occasional paw licking is normal self-grooming. The concern is persistent, focused licking — returning repeatedly to the same paw or the same area between toes, often resulting in brown saliva staining, hair loss, or visible skin changes. Understanding the cause determines the appropriate response, because treating the behavior without addressing the underlying trigger doesn’t resolve the problem.
Differentiating Allergies, Stress, and Infections
The four main drivers of excessive paw licking in dogs are allergies, infections, foreign bodies, and behavioral/stress causes.
Allergies are the most common cause. Both environmental allergens (grass pollen, dust mites, mold) and food allergens can trigger paw pruritus (itchiness). The pattern matters: environmental allergies tend to be seasonal or worsen after outdoor exposure; food allergies produce year-round symptoms. Dogs with allergies typically lick multiple paws, not just one. For a detailed breakdown of allergy triggers and management, see our dog allergy and skin care guide.
Yeast and bacterial infections (pododermatitis) develop when the warm, moist environment between the toes supports overgrowth of Malassezia yeast or Staphylococcus bacteria. Signs include brown-red discoloration between the toes from saliva staining, a musty or pungent odor stronger than the normal corn chip smell, and visibly irritated or thickened skin. A veterinarian can confirm this with a simple skin cytology (tape strip) test.
Foreign bodies produce sudden, focused licking of a single paw — typically starting immediately after a walk. A thorn, grass awn, or glass fragment lodged between the toes is a common cause.
Stress and anxiety drive compulsive licking in some dogs, similar to nail-biting in humans. In these cases, no physical abnormality is found on examination, and the licking typically reduces or stops when the dog is engaged or when the stressor is removed.
| Cause | Characteristic Pattern | Diagnostic Clue |
|---|---|---|
| Environmental allergy | Seasonal worsening, multiple paws | Allergy testing |
| Food allergy | Year-round, multiple paws | Elimination diet trial |
| Yeast/bacterial infection | Brown discoloration, odor between toes | Skin cytology |
| Foreign body | Sudden onset, single paw | Visual inspection |
| Stress/anxiety | Situational, resolves with engagement | Behavior history |
How to Reduce Compulsive Licking
The approach depends entirely on what’s driving it:
- If allergies are suspected: Review diet for common allergens (chicken, beef, wheat, dairy are frequent culprits); reduce environmental allergen load (regular vacuuming, washing bedding); consult a veterinarian for allergy testing or a prescription hydrolyzed protein diet trial.
- If infection is suspected: Dry the paws thoroughly after every walk; use a veterinarian-prescribed antimicrobial or antifungal paw wash 2–3 times per week; avoid keeping paws continuously damp.
- If a foreign body is possible: Inspect carefully between each toe and at the base of each nail under good light; use tweezers only if the object is visible and can be safely grasped.
- If behavioral: Increase physical exercise and mental stimulation (puzzle feeders, nose work activities are particularly effective); consult a veterinary behaviorist or trainer if licking has become compulsive and persists despite physical health being confirmed normal.
If paw licking persists beyond two weeks, or if skin changes (redness, swelling, discharge, hair loss) have developed, veterinary diagnosis is the most direct path to resolution.
Seasonal Paw Care Calendar
Different times of year bring different threats to paw health. The table below summarizes the key risk factors and corresponding care actions by season.
| Season | Primary Risk | Key Care Actions |
|---|---|---|
| Spring | Ticks, grass seed awns, pollen allergens | Post-walk inspection for foreign bodies and ticks; monitor for new licking behavior |
| Summer | Pavement burns, hot asphalt | 7-second pavement test before walks; walk early morning or evening; consider booties for midday outings |
| Fall | Drying begins, fungal debris in fallen leaves | Start moisturizing routine; clean between toes after walks in leaf litter |
| Winter | Road salt and de-icers, frostbite | Post-walk rinse-and-dry routine; paw balm after drying; booties in heavily salted areas |
Adjusting your paw care routine as seasons shift — rather than reacting after a problem appears — prevents the majority of paw pad issues before they need treatment.
FAQ
My dog's paw pad color has changed — is that a problem?
I cut the quick while trimming nails and it's bleeding — what do I do?
Is the corn chip smell on my dog's paws normal?
Should I wash my dog's paws after every walk?
Can I use coconut oil or olive oil as a paw moisturizer?
Related Articles
Cat Spring Shedding: 5 Vet-Backed Steps to Control the Fur
Cat spring shedding explained: why it happens, how to tell normal from abnormal, and 5 vet-backed steps to manage fur and prevent hairballs.
Dog Hydrotherapy: 4 Ways Water Therapy Rebuilds Joint Strength
Discover how dog hydrotherapy uses buoyancy and resistance to rebuild joint strength. Covers underwater treadmill vs pool therapy, who benefits, session expectations, and safe at-home options.
How to Massage Your Dog's Joints: A Step-by-Step Home Guide for Every Condition
Dog joint massage guide for arthritis, hip dysplasia, and post-surgery rehab. Step-by-step protocols for every joint with breed-specific pressure tips.
Dog Joint Surgery Recovery: A Vet-Based Week-by-Week Rehab Guide
Dog joint surgery recovery guide covering TPLO, patellar luxation, hip surgery, and disc surgery. Week-by-week rehab timeline and home care protocols.
Red Light Therapy for Dogs at Home: A Science-Based Safety Guide
Learn how red light and near-infrared therapy works for dogs, what the research actually shows, and how to use it safely at home — with dosimetry guidance.
Luxating Patella Exercises for Dogs: A Grade-by-Grade Home Rehab Guide
Grade-specific exercises for dogs with luxating patella — from foundation moves for Grade I-II to aquatic alternatives. Includes reps, sets, and a safety checklist.
How Near-Infrared Therapy Works for Dogs
Discover how near-infrared (NIR) therapy helps relieve joint pain and inflammation in dogs through scientific mechanisms.
Senior Dog Joint Care Guide
A comprehensive guide to maintaining joint health and managing pain in aging dogs.
How to Safely Restart Your Dog's Activity After Winter: A Spring Joint Care Guide
Spring dog joint care guide: assess winter deconditioning, follow a 4-week progressive activity plan, and spot warning signs before they become injuries.
Are Cat Hairballs Really Normal? The Truth About Prevention and Risk
Cat hairball prevention explained: what's a safe frequency, when vomiting signals danger, and an integrated 3-pillar approach — grooming, diet, and environment.
3 Health Warning Signs Hidden in Your Dog's Tear Stains
Dog tear stains signal more than cosmetic issues. Learn to identify root causes—nasolacrimal obstruction, allergies, diet, infection—and apply cause-specific management strategies.