How to Clean Dog Ears at Home: A Guide by Ear Type
Ear cleaning is one of those home-care tasks that falls through the cracks until a problem surfaces. By then — head shaking, scratching, a smell you cannot ignore — a simple maintenance routine has become a veterinary visit. The good news is that learning how to clean dog ears at home is straightforward once you understand your dog’s ear anatomy, the right supplies, and how to adapt the routine to your dog’s specific ear structure.
This guide covers the full process: a clear 6-step technique, breed-specific protocols for floppy, erect, and hairy-canal ears, a frequency guide, an ingredient breakdown for choosing a cleaning solution, and a 3-phase desensitization plan for dogs who actively resist ear handling.
Why Regular Ear Cleaning Matters for Your Dog
Most owners clean ears reactively — after they notice something off. Proactive cleaning, done at the right frequency, prevents the conditions that lead to ear infections and chronic otitis in the first place.
Understanding Your Dog’s L-Shaped Ear Canal
A dog’s ear canal is not straight like a human’s. It runs vertically downward from the ear opening, then turns roughly 45 to 90 degrees horizontally before reaching the eardrum. This L-shape means debris, moisture, and wax naturally accumulate at the bend rather than working their way out.
The anatomy also explains why Q-tips are genuinely dangerous: what feels like surface cleaning can drive material around the corner and pack it against the eardrum, where it cannot escape and becomes a breeding ground for bacteria and yeast.
What Happens When You Skip Ear Cleaning
Infrequent cleaning allows the normal, small amount of ear wax and debris to accumulate past the ear’s self-clearing capacity. In warm, humid conditions — or in any ear with restricted airflow from heavy flaps or dense hair — moisture combines with that debris to create an environment where Malassezia (yeast) and Pseudomonas or Staphylococcus bacteria multiply rapidly.
The progression from minor buildup to active infection can take only days in susceptible dogs. For breeds already prone to skin and environmental allergies, the ear canal is often the first and most persistent site of inflammation. If your dog has known allergies, the approach to ear care needs adjustment — see the section on allergy-prone dogs and ear care for a more detailed protocol.
What You’ll Need Before You Start
Gathering supplies before you begin keeps the session calm and efficient. Dogs read transitions — if you leave the room to get cotton balls, you lose the behavioral momentum you built.
Choosing the Right Ear Cleaning Solution
The single most important supply is a quality ear cleaning solution. Look for products formulated specifically for dogs — not home remedies, not human ear drops. Veterinary-formulated solutions are buffered to the appropriate pH for the canine ear canal and contain drying agents that help prevent post-cleaning moisture buildup.
Products with salicylic acid, lactic acid, or ceramide-based formulations are well-supported for routine maintenance. In the US, widely available options include solutions from Virbac (Epi-Otic) and Zymox — referenced here for their ingredient profiles, not as direct endorsements. The ingredient section below explains what to look for when comparing any product.
Do not use:
- Rubbing alcohol or vinegar — both are too harsh and can inflame already-sensitive canal skin
- Hydrogen peroxide — creates foam that can mask problems and irritates tissue
- Plain water — does not dissolve wax and leaves moisture that encourages growth of bacteria and yeast
Why Cotton Balls Beat Q-Tips Every Time
Cotton balls, cosmetic pads, or gauze squares are the right tools for ear cleaning. Tear a cotton ball into a shape that fits comfortably in the outer ear, wipe visible folds and surfaces, and discard. If the wipe comes out heavily soiled, use a fresh one.
Q-tips — even the kind marketed for dogs — carry meaningful risk. The rigid stem makes it easy to accidentally push material around the canal’s L-bend, and the narrow tip can contact the eardrum if inserted past the visible entrance. Cotton balls naturally stop at the point of resistance.
Treats and Rewards for Positive Association
High-value treats are not optional — they are part of the technique. Small, soft, smelly treats (cheese, boiled chicken, commercial training treats) create a positive emotional state throughout the process. Feed continuously rather than only at the end; this conditions the cleaning process itself, not just completion.
Full supply checklist:
- Veterinarian-approved ear cleaning solution
- Cotton balls or gauze pads (have several on hand)
- High-value treats, divided into small pieces
- A towel (for the shake-out phase)
- Adequate lighting — a headlamp is genuinely useful
- Patience — never clean ears when you are rushed
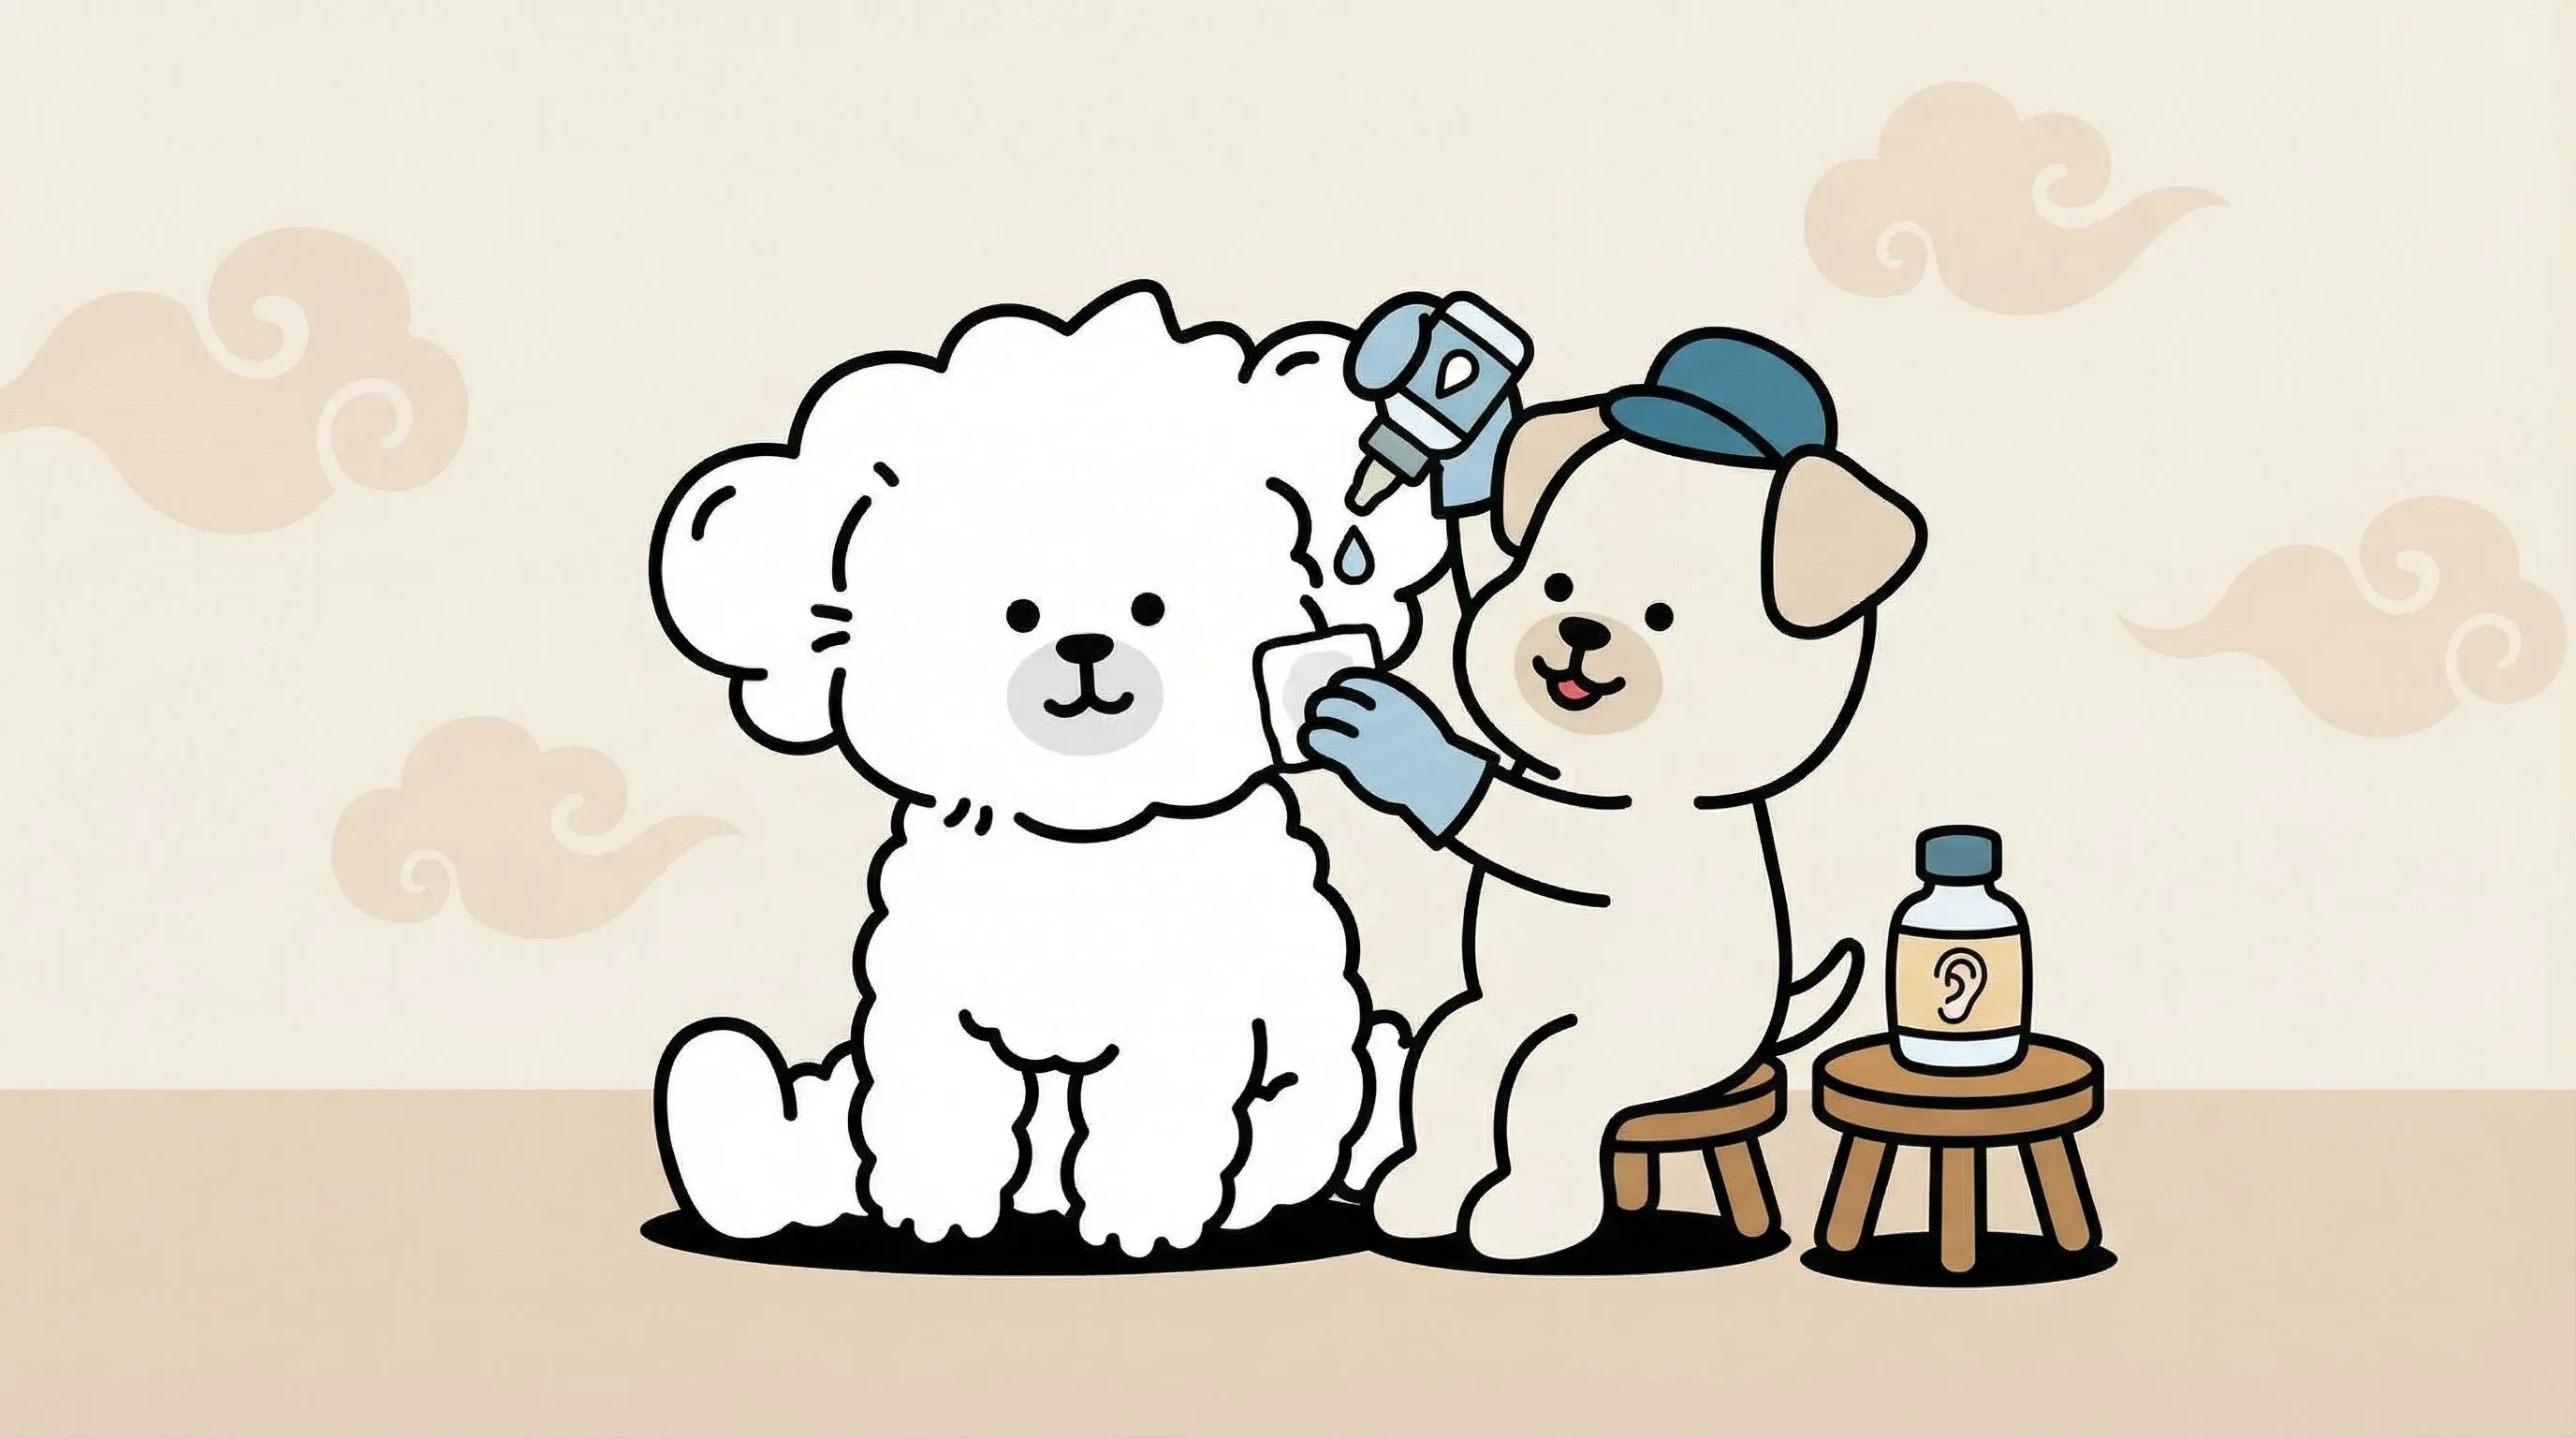
How to Clean Your Dog’s Ears in 6 Steps
This 6-step process applies to most dogs for routine maintenance cleaning. Adjust quantities and frequency based on the breed-specific guidance in the next section.
Step 1: Check the Outer Ear for Warning Signs
Before adding any solution, examine the ear canal entrance and the inner pinna (the visible flap interior) in good light.
Signs that mean you should stop and call your vet:
- Dark brown or black discharge that looks like coffee grounds (common presentation of ear mites or yeast infection)
- Any blood or streaky red discharge
- Strongly foul or unusual odor
- Visible swelling, redness, or heat in the ear flap or canal entrance
- Your dog flinches, yelps, or shows aggression when you touch the ear base
If the ear looks pale pink with a small amount of light-colored wax and no odor, proceed. Cleaning an infected or inflamed ear without veterinary guidance can push bacteria deeper and significantly worsen the outcome.
Step 2: Apply the Right Amount of Cleaning Solution
Hold the ear flap gently upward to straighten the canal as much as possible. Position the solution nozzle at the ear canal entrance — do not insert it. Squeeze in enough solution to visibly fill the canal; most dogs need 5–10 ml per ear, though follow your solution’s label guidance.
The canal should feel slightly full. Many dogs will try to shake immediately; hold the ear closed gently and proceed to the next step before releasing.
Step 3: Gently Massage the Base of the Ear (30 Seconds)
Fold the ear flap down over the opening and massage the base of the ear — the external cartilage below the ear entrance — with your fingers in a circular motion for a full 30 seconds. You will hear a soft squishing sound as the solution works through the canal debris.
This step is where the actual cleaning happens. The solution loosens the wax and debris at the canal bend so it can float upward to the entrance where you can wipe it out. Skipping or shortening the massage significantly reduces effectiveness.
Step 4: Let Your Dog Shake It Out
Release the ear and step back or hold the towel as a shield. Your dog will shake the head, which propels the loosened debris upward and out of the canal. This is a good sign — the solution has done its job.
Do not try to suppress the shake or wipe before it happens. The centrifugal action does more debris removal than any wiping technique.
Step 5: Wipe the Outer Ear Gently
With a fresh cotton ball or gauze, wipe the outer canal entrance and the visible ridges of the inner ear flap. Remove any debris that has migrated outward. Use a new cotton ball each pass — reusing spreads debris back into the canal.
Wipe only what you can see. If the cotton ball reaches resistance, stop. Never probe beyond the visible canal entrance.
Repeat Step 2 through Step 5 once more if the cotton balls are still coming back heavily soiled. Two full cycles are usually sufficient for routine maintenance; if more are needed, the ear likely has a buildup that warrants veterinary assessment.
Step 6: Reward and Wrap Up
Deliver a jackpot of treats immediately after completing each ear, then give your dog a minute to shake, settle, and receive calm praise. End every session on a positive note — even if it was messy or imperfect. The emotional tone of the ending is what your dog will remember for the next session.
Ear Cleaning by Ear Type: A Breed-Specific Guide
No single frequency or technique applies equally to all dogs. The shape of the ear determines airflow, moisture retention, and vulnerability to infection.
Floppy Ears (Cocker Spaniels, Basset Hounds, Beagles, Labs)
Pendulous ear flaps trap heat and humidity against the canal entrance, drastically reducing the airflow that normally keeps the canal dry. Labs and Golden Retrievers — especially those who swim — combine floppy ears with frequent water exposure, making them some of the most prone dogs to recurrent otitis.
| Factor | Impact |
|---|---|
| Airflow | Severely restricted by the hanging flap |
| Moisture retention | High — sweat and humidity accumulate under the flap |
| Recommended frequency | Weekly to every 10 days; after every swim |
| Special consideration | Lift and air the ear flap daily; dry thoroughly after baths |
After bathing a floppy-eared dog, hold each ear flap up for a few minutes to allow the canal to air-dry before letting the flap fall back. A few seconds with a low-heat hair dryer held at least 8 inches away can assist, but never insert warm air directly into the canal. Managing your dog’s ear health during grooming starts at bath time — see protecting ears during the first bath and beyond for early habit-building.
Erect Ears (German Shepherds, Huskies, Corgis)
Standing ears allow significantly better natural ventilation, which is why erect-eared breeds generally have fewer ear problems than floppy-eared breeds. The canal dries more readily between cleanings, and the entrance remains more accessible for visual checks.
| Factor | Impact |
|---|---|
| Airflow | Good — ear opening faces forward and upward |
| Moisture retention | Low under normal conditions |
| Recommended frequency | Every 3–4 weeks for maintenance; more often during humid summer months |
| Special consideration | Still vulnerable to debris accumulation and grass seeds in active outdoor dogs |
Visual inspection during routine brushing is often sufficient to monitor ear health between cleanings. Because erect-eared dogs are naturally lower-risk, over-cleaning can become a problem — disrupting the natural wax flora that helps protect the canal.
Hairy Ear Canals (Poodles, Bichons, Schnauzers, Doodles)
Dogs with hair growing inside the ear canal present a distinct challenge. Dense hair restricts airflow similarly to floppy ears, and the hair itself can trap wax, debris, and moisture close to the canal wall.
| Factor | Impact |
|---|---|
| Airflow | Restricted by hair density |
| Moisture retention | Moderate to high depending on hair volume |
| Recommended frequency | Every 1–2 weeks; inspect after grooming sessions |
| Special consideration | Ear hair removal: discuss with your vet before plucking |
On the topic of ear hair plucking — once standard in many grooming guides — current veterinary dermatology has revisited this practice. Plucking creates micro-abrasions in the canal skin, which can actually increase infection risk in dogs without pre-existing hair buildup problems. Many board-certified veterinary dermatologists now recommend trimming rather than plucking, or leaving the hair unless it is visibly matted. Ask your veterinarian what approach is right for your specific dog.
| Ear Type | Airflow | Cleaning Frequency | Key Risk |
|---|---|---|---|
| Floppy (pendulous) | Poor | Weekly–10 days | Chronic moisture, recurrent yeast/bacterial infection |
| Erect (upright) | Good | Monthly | Debris, foreign bodies |
| Hairy canal | Moderate–poor | Every 1–2 weeks | Hair trapping wax; micro-abrasions from plucking |
| Floppy + hairy | Very poor | Weekly | Compounded risk — consult vet for management plan |
How Often Should You Clean Your Dog’s Ears?
One of the most common questions dog owners search is “how often to clean dog ears” — and the honest answer is that it depends. There is no universal schedule that applies safely across breeds.
General Guidelines by Ear Type
A practical framework based on ear type and lifestyle:
- Weekly: Cocker Spaniels, Basset Hounds, Setters, and other classic floppy-eared breeds; any dog who swims regularly
- Every 1–2 weeks: Poodles, Bichon Frises, Schnauzers, and other hairy-canal breeds
- Every 3–4 weeks: Most erect-eared breeds under normal conditions
- After every swim: All breeds, regardless of baseline schedule
- After baths: Any breed with restricted airflow (floppy, hairy canal)
Over-cleaning is a real problem, not just under-cleaning. Cleaning too frequently removes the natural wax layer that provides a protective acidic barrier. Dogs who are cleaned daily or near-daily can develop raw, irritated canals more susceptible to infection than if they had been left alone. If you are cleaning more than twice a week outside of post-swim situations, discuss the frequency with your veterinarian.
Seasonal Adjustments (Summer Humidity vs Winter Dryness)
Warm, humid months create conditions where ear infections peak. In states like Florida, Louisiana, and the Gulf Coast — or anywhere with a humid summer season — floppy-eared and hairy-canal dogs may need to move to weekly cleaning from late spring through early fall, then reduce to their normal frequency in drier months.
Winter dryness has the opposite effect: the canal environment is less hospitable to yeast overgrowth, and cleaning every 3–4 weeks may be sufficient even for breeds that needed weekly cleaning in summer. Seasonal humidity and skin health changes affect the ears as much as the rest of the coat.
After Baths and Swimming: Special Ear Care Protocol
Water in the ear canal is the single most preventable trigger for ear infections. Warm bath water or lake water sitting in the L-bend of the canal creates an ideal bacterial and yeast environment within hours.
Protocol for after swimming:
- Use a dry cotton ball to absorb visible water from the outer canal entrance immediately after your dog exits the water.
- Apply a small amount of a drying ear cleaner (one that contains a gentle drying agent, such as boric acid or isopropyl alcohol in low concentrations designed for ear use) per the product label.
- Massage the base for 30 seconds and allow your dog to shake.
- Wipe the outer canal gently.
- Lift and hold floppy ears for a few minutes to allow passive air drying.
Do not skip this step even if your dog seems fine — infection often develops over 24–48 hours after exposure, well after the water is forgotten.
Ear Cleaner Ingredient Guide
The US market has dozens of ear cleaning products, ranging from effective veterinary-formulated solutions to ineffective or potentially harmful home remedies. Understanding what to look for removes the guesswork.
What to Look For: Salicylic Acid, Ceramides, Aloe
| Ingredient | Function | Good for |
|---|---|---|
| Salicylic acid (low concentration) | Keratolytic — gently loosens dead skin cells and wax | Routine maintenance; waxy buildup |
| Lactic acid / malic acid | pH-adjusting; mild antimicrobial environment | General maintenance; yeast-prone ears |
| Ceramides | Supports the skin barrier of the canal lining | Sensitive or frequently irritated ears |
| Aloe vera | Soothing; reduces minor inflammation | Post-cleaning comfort in irritated ears |
| Docusate sodium (DOSS) | Surfactant that breaks up heavy wax buildup | Heavy cerumen accumulation |
| Boric acid (low concentration) | Drying, mild antifungal | Post-swim; moisture-prone ears |
Look for products that list their active ingredients and are formulated at an appropriate pH (the canine ear canal is slightly acidic, roughly pH 5.5–6.5). Products that are “veterinarian recommended” without an ingredient list should be compared carefully.
What to Avoid: Alcohol, Hydrogen Peroxide
| Ingredient | Why to avoid |
|---|---|
| Isopropyl alcohol (full concentration) | Dries and burns irritated canal tissue; not appropriate for inflamed ears |
| Hydrogen peroxide (H₂O₂) | Produces foam and cellular damage in canal tissue; can mask infection signs |
| Tea tree oil | Toxic to dogs at higher concentrations; irritating even at low concentrations |
| Plain water | Adds moisture without the drying agents needed to remove it; leaves a residue |
| Essential oils (undiluted) | Irritating and potentially toxic; no role in evidence-based ear care |
Home remedies using diluted apple cider vinegar are sometimes recommended in online dog communities, but veterinary dermatologists generally do not support this practice. In ears with any pre-existing inflammation or micro-abrasions — which are often invisible — even diluted acid causes pain and disrupts healing.
Choosing for Sensitive or Allergy-Prone Dogs
Dogs with environmental or food allergies frequently have chronic ear inflammation as a primary symptom — not a secondary one. In these dogs, the ear canal skin is already compromised, and standard maintenance cleaners may cause more irritation than benefit during flare-ups.
For allergy-prone dogs, look for ceramide-containing or gentle, fragrance-free formulations. During active allergy flares, check with your veterinarian before cleaning — a compromised canal may need medicated treatment rather than mechanical cleaning, and the two should not be combined without guidance. The relationship between skin allergies and ear health in dogs runs deep enough that managing the underlying allergy often dramatically reduces ear problems.
My Dog Hates Ear Cleaning: A 3-Step Desensitization Plan
Ear sensitivity is natural. Paws, ears, and mouths are the areas of highest nerve density in dogs, and many dogs find them intensely uncomfortable to have handled — especially if they have had a painful experience during cleaning in the past, or were never acclimatized to ear handling as puppies.
Forcing through resistance creates a dog who becomes increasingly difficult to examine, making future veterinary visits harder and more stressful for everyone. A structured desensitization approach takes longer upfront but creates lasting cooperation.
Phase 1: Getting Comfortable with Ear Touching
Goal: Your dog associates any touch near the ears with something good.
Duration: 3–7 days, 2–3 short sessions per day (2–3 minutes each)
Start with neutral areas (the neck, behind the ears, the top of the head) and work gradually closer to the ear opening over several days. Every touch gets an immediate treat. Watch for early stress signals — lip licking, yawning, leaning away, tensing — and back off if you see them. The goal is to end every session before your dog becomes uncomfortable, not after.
Once your dog is relaxed with you touching the ear flap and the area just inside the ear entrance, move to Phase 2.
Phase 2: Adapting to Solution Sounds and Sensations
Goal: Your dog is comfortable with the cleaning bottle and the sensation of liquid in the ear.
Duration: 3–5 days
Day 1–2: Bring out the cleaning solution bottle. Let your dog sniff it. Place the closed bottle near the ear without touching it. Reward generously. Repeat several times per day.
Day 3: Warm the solution bottle slightly in your hands (cold solution in the ear canal is genuinely unpleasant and a common reason dogs resist). Apply a single small drop to the inner ear flap — not inside the canal. Treat immediately. Repeat once or twice, no more.
Day 4–5: Apply the solution to the outer canal entrance as described in the 6-step technique. Treat continuously throughout. Allow the shake. End the session without wiping — just the application and the shake is a win.
If at any point your dog becomes visibly distressed (trembling, panting, attempting to flee, growling), return to Phase 1 and progress more slowly.
Phase 3: Short Sessions, Gradually Longer
Goal: Your dog tolerates a complete cleaning, then a routine cleaning.
Duration: 1–2 weeks
Begin with one ear only. Apply solution, massage 15 seconds (not the full 30), allow the shake, and wipe briefly. Treat throughout and jackpot at the end. Over the following days, extend the massage duration toward 30 seconds, add the second ear, and build toward a full routine session.
The most important rule in this phase: always stop before your dog reaches their stress threshold, not after. A session that ends with your dog calm and willing gets you further than pushing through to completion with a distressed dog. A dog who willingly approaches the ear cleaning area over time is a genuine success.
For dogs with severe fear or aggression during ear handling, a consultation with a board-certified veterinary behaviorist or a fear-free certified veterinarian is appropriate. Some dogs benefit from anti-anxiety medication during the initial desensitization period; this is not a failure — it is evidence-based practice.
Ear Health Self-Check: When to Clean vs When to Call the Vet
Not every ear situation calls for cleaning. One of the most common owner errors is cleaning a visibly abnormal ear at home — which can push infection material deeper and delay treatment.
Normal vs Caution vs Vet Visit: A Quick Reference
| What you observe | What it likely means | Action |
|---|---|---|
| Small amount of pale yellow or tan wax, no odor | Normal ear self-cleaning | Routine maintenance cleaning |
| Light tan wax, slightly more than usual, mild odor | Minor buildup | Clean now; monitor; vet if recurring |
| Dark brown waxy buildup, musty odor | Yeast overgrowth likely | Vet appointment before cleaning |
| Black crumbly material, strong odor | Yeast/bacterial infection or ear mites | Vet appointment — do not clean at home |
| Brown/red discharge, any blood | Active infection or trauma | Same-day vet appointment |
| Head shaking, scratching ear repeatedly | Discomfort/early infection | Examine ear; if any abnormal appearance, see vet |
| Tilted head, loss of balance | Inner ear involvement | Urgent vet visit |
| Swollen ear flap (hematoma) | Blood pooling from head shaking | Veterinary treatment required |
When in doubt: look but do not clean. A veterinary examination takes 10 minutes and gives you a clear answer. Cleaning before that examination often makes the examination harder to interpret.
Ear Wax Color and Smell: What They Mean
The color and consistency of ear discharge is diagnostically useful — veterinarians use it alongside microscopy to identify the type of organism present.
Pale yellow or ivory: Normal cerumen. Small amounts are protective.
Honey-colored or amber: Slightly elevated wax production, often seen with early moisture exposure or mild allergies. Not alarming, but worth monitoring.
Dark brown or black: Associated with yeast (Malassezia) overgrowth, which produces a characteristic musty, sweet-sour odor. Often the first visible sign that an ear needs veterinary assessment rather than home cleaning.
Reddish-brown, coffee-ground texture: Strongly associated with ear mites (Otodectes cynotis) — particularly in puppies or in dogs recently exposed to untreated cats. Veterinary diagnosis required.
Gray or yellow-green: Bacterial infection (gram-negative organisms such as Pseudomonas) — often with a distinctly foul, pungent odor. Requires prescription treatment.
Odor without visible change: Sometimes the first detectable sign of an infection is smell before visible discharge develops. Trust your nose — if the ear smells “off” without an obvious explanation, a veterinary check is appropriate.
Understanding what a healthy ear looks like makes abnormalities obvious. Building ear inspection into your regular grooming routine alongside nail care and coat maintenance means you will notice changes before they progress into infections requiring prescription treatment.
FAQ
Can I use Q-tips to clean my dog's ears?
How often should I clean my dog's ears?
What should I use to clean my dog's ears at home?
What does healthy dog ear wax look like?
My dog hates ear cleaning. What should I do?
Should I clean my dog's ears after swimming?
Is ear hair plucking necessary for dogs like Poodles?
When should I see a vet instead of cleaning my dog's ears at home?
Related Articles
Cat Spring Shedding: 5 Vet-Backed Steps to Control the Fur
Cat spring shedding explained: why it happens, how to tell normal from abnormal, and 5 vet-backed steps to manage fur and prevent hairballs.
Dog Hydrotherapy: 4 Ways Water Therapy Rebuilds Joint Strength
Discover how dog hydrotherapy uses buoyancy and resistance to rebuild joint strength. Covers underwater treadmill vs pool therapy, who benefits, session expectations, and safe at-home options.
How to Massage Your Dog's Joints: A Step-by-Step Home Guide for Every Condition
Dog joint massage guide for arthritis, hip dysplasia, and post-surgery rehab. Step-by-step protocols for every joint with breed-specific pressure tips.
Dog Joint Surgery Recovery: A Vet-Based Week-by-Week Rehab Guide
Dog joint surgery recovery guide covering TPLO, patellar luxation, hip surgery, and disc surgery. Week-by-week rehab timeline and home care protocols.
Red Light Therapy for Dogs at Home: A Science-Based Safety Guide
Learn how red light and near-infrared therapy works for dogs, what the research actually shows, and how to use it safely at home — with dosimetry guidance.
Luxating Patella Exercises for Dogs: A Grade-by-Grade Home Rehab Guide
Grade-specific exercises for dogs with luxating patella — from foundation moves for Grade I-II to aquatic alternatives. Includes reps, sets, and a safety checklist.
How Near-Infrared Therapy Works for Dogs
Discover how near-infrared (NIR) therapy helps relieve joint pain and inflammation in dogs through scientific mechanisms.
Senior Dog Joint Care Guide
A comprehensive guide to maintaining joint health and managing pain in aging dogs.
How to Safely Restart Your Dog's Activity After Winter: A Spring Joint Care Guide
Spring dog joint care guide: assess winter deconditioning, follow a 4-week progressive activity plan, and spot warning signs before they become injuries.
Are Cat Hairballs Really Normal? The Truth About Prevention and Risk
Cat hairball prevention explained: what's a safe frequency, when vomiting signals danger, and an integrated 3-pillar approach — grooming, diet, and environment.
7 Essential Dog Paw Care Tips Every Owner Should Know
Your complete dog paw care guide: moisturizing cracked pads, trimming nails, preventing hot pavement burns, winter de-icer hazards, first aid for injuries, and when to call the vet.
3 Health Warning Signs Hidden in Your Dog's Tear Stains
Dog tear stains signal more than cosmetic issues. Learn to identify root causes—nasolacrimal obstruction, allergies, diet, infection—and apply cause-specific management strategies.
Puppy First Bath: A Stress-Free Step-by-Step Guide
When to give a puppy their first bath, how to bathe them safely, choose the right shampoo, dry properly, and handle bath fear.
Cat Skin Allergies: Causes, Symptoms, Treatment, and Home Care Guide
Cat skin allergies cause scratching, hair loss, and rashes. This evidence-based guide covers all 4 types, vet-approved home remedies, medications, and an 8-week elimination diet protocol.
Why Is My Dog Throwing Up? Causes by Vomit Color and When to See the Vet
Learn the most common dog vomiting causes by vomit color, breed risk factors, emergency warning signs, and a step-by-step home care protocol from hours 0–24.
How to Trim Cat Nails Safely: A Complete Home Guide
Learn how to trim cat nails safely at home — find the quick, choose tools, and handle emergencies. Age-specific tips for kittens to seniors.
Puppy Vaccination Schedule: Shots, Costs & Side Effects
Complete puppy vaccination schedule by age, 2026 US cost ranges, side effect warning signs, missed dose protocol, and titer testing explained.
How to Trim Dog Nails: Step-by-Step Guide for Every Owner
Learn how to trim dog nails safely at home — understand the quick, compare clippers vs grinders, handle bleeding, and build a routine by life stage.
How to Brush Your Dog's Teeth: A Step-by-Step Desensitization Guide
Learn how to brush dog teeth with a 5-step desensitization program, stubborn dog troubleshooting, VOHC-approved alternatives, and age-specific tips.
Ear Mites in Cats: Symptoms, Treatment, and Prevention Guide
Ear mites in cats cause dark discharge and intense scratching. Identify symptoms, compare vet treatments, evaluate home remedies, and keep all pets safe.